Make science fun by growing these crystal snowflakes! Last year, my kids brought home these twisted pipe cleaners and a baggies of borax from their grandma’s house with some instructions. We followed the instructions and were amazed! This science project is super easy and produces impressive results!

Keep reading for the detailed instructions and the science behind why it works!
What you need
- Pipe cleaners
- 9 tablespoons (or more) of Borax (found near the laundry detergent)
- 3 cups of water
- Jar or vase
- Pencil
- Yarn
Growing your crystal snowflakes
(Warning: Borax dust can be irritating to the eyes and skin.)
Step 1: Prepare your snowflake
Create your snowflake using the pipe cleaners. Cut a piece of yarn and hang the snowflake from the pencil. You want to be sure it hangs so it is not touching the sides or the bottom of the container, but will be completely covered by water.

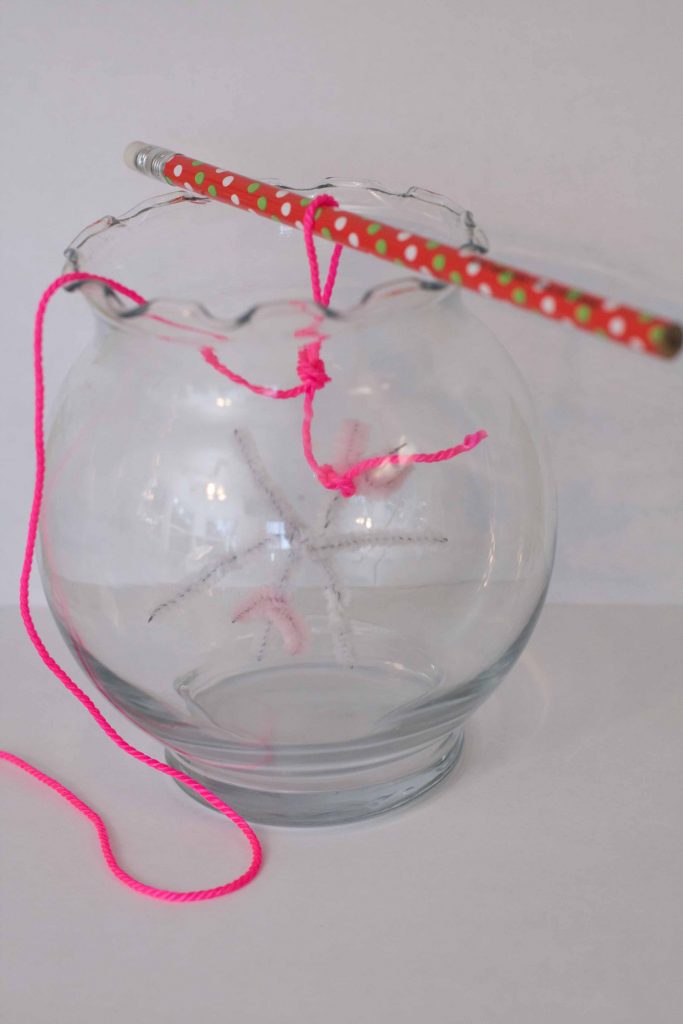
Step 2: Prepare your suspension
Boil your water and pour it into the jar. Carefully measure 9 tablespoons of borax and mix into the hot water. Be careful! The water is HOT and the borax can irritate the eyes and skin. Measure and pour it gently and slowly.
Continue adding borax until there is a little settled on the bottom that won’t dissolve. This tells you that the water is completely saturated.

Looking for another fun science project? Check out this owl pellet dissection post!
Step 3: Add your snowflake and wait
Suspend your snowflake in the solution and set it in a place where it won’t be disturbed for a few hours (some sites say 24, but we only did about 6 and the snowflakes are amazing!). You’ll begin seeing growth before then, so check back and prepare to be amazed!

Step 4: Enjoy your crystal snowflakes!
Remove your crystal snowflakes from the solution and let them dry on a paper towel. Then hang them in your home as a pretty winter decoration!


Do you have nature lovers in your life? This nature study gift guide is just for you!
How it works
These crystal snowflakes aren’t just pretty, they’re a great science lesson about how water molecules work, how solutions are made, and how crystals are formed!
How Water Molecules Act
When water is at room temperature, the molecules (tiny parts that make up water – you can’t see them without a very strong microscope) move at a steady pace. When you heat or cool water, those molecules act differently.
As it cools down, the water molecules slow down and get closer together. If cooled enough, the molecules stop moving altogether, and you get ice!
If you heat water up, the opposite happens. The water molecules speed up and move away from one another. If you heat it enough, those water molecules will evaporate and become a gas.
Solutions and Suspensions
To form a solution, you simply dissolve a solid into a liquid. (That’s a very basic description. For more on solutions, you can visit this website.) If you were to take your borax and pour it in room temperature water and stir until it was all dissolved, you would have a solution.
When you boil the water and those molecules move apart from each other, it creates MORE room for MORE of the borax to dissolve, suspending it in the water. The water looks cloudy because there’s so much borax just sitting there.
How the Crystal Snowflakes Form
As the water begins to cool, there’s less room for the borax. The water molecules come closer together and push the borax out. As it comes out of the water, the borax finds places to settle. Those tiny bits grab onto whatever they can! Imperfections in your glass jar, bumps, cracks, the pipe cleaner snowflake, the yarn…anything they can! (These spots are called nucleation sites.)
The first crystals are called seed crystals and they’re too tiny to see. But then, as more borax is pushed out, it grabs on to those seed crystals and they begin to grow. Eventually, if you leave the jar alone, beautiful crystals form!

So fun! I love it when science is fun… and pretty!
Me too! Thanks for introducing this experiment to us!