Spring might not be here yet, but we’re in that time of year when it feels just on the cusp! Daffodils are starting to poke through the ground, the trees have tiny buds, and the birds are starting to sing. There’s also snow in the forecast, but let’s ignore that… What better way to ignore the cold weather than to pull out some fun spring crafts? I just love these mini decorative birdhouses from Dollar Tree. They’re so cute and they make the perfect spring decor — once beautified!

*Disclaimer* Not all these birdhouses are from Dollar Tree. I will be writing a tutorial for how to decorate the others in a post soon.
So, the first set of birdhouses I made was not from Dollar Tree. They’re ones that I picked up at a garage sale or something a long time ago that sat in my craft room for years. I finally decided they needed a cute makeover for spring. It was a LOT of work measuring, cutting, trimming, re-cutting because I’d messed something up… Let’s just say, they turned out beautiful, but I knew there had to be a better way!
I decided to figure out a pattern for cutting the shapes I needed for the birdhouses that are available at Dollar Tree. That way, I could make as many as I wanted (and share them with you!) and never have to re-measure again! I have created both a pattern to be used as a stencil to cut with scissors and also an SVG and DXF cut files for those of you with Cricuts or Silhouettes. (Links to both below)
These birdhouses are adorable with spring paper, but would also look amazing with an Americana look, Christmas paper, a fun summer print, or with wintery blues. Pretty much any theme you can imagine, you could use to decorate these mini birdhouses from Dollar Tree.
Six Uses for these Decorative Birdhouses
- Use them as place markers at the Easter table. Lean a name card on the front of each birdhouse around the table for a pretty, spring look.
- Put them on the fireplace mantle. Lining these along the mantle would be the perfect simple decor for spring.
- Hang these in a tree outside. Although these mini birdhouses won’t actually work for birds, they’ll look sweet hanging from the branches of a small tree.
- Use them as key hangers. Add a little hook to the bottom of these birdhouses and turn them into a handy place to hang your keys, like the ones at the end of this blog post.
- Sell them at craft fairs. These beautiful decorative birdhouses would be a great addition to a spring craft fair! Make them in lots of different themes so you can market to a wide audience.
- Add them to a wreath. I’ve been really into wreaths lately and I think these would be adorable on a spring wreath! If you love wreaths as much as I do, you’ll want to check out my Dogwood Wreath Tutorial and my Succulent Wreath Tutorial.
Decorative Birdhouses for Spring – Tutorial
Supplies for Decorating your Mini Birdhouses

Birdhouses from Dollar Tree (The ones pictured are not from DT. They are from my original project)
Pattern (Cut Files – includes SVG, DXF, and PNG, Stencil)
White Paint
Sponge Brushes
Scrapbook Paper
Mod Podge
Scissors or a cutting machine like a Silhouette or Cricut
Step 1: Download the Birdhouse Pattern
SVG/DXF cut file can be found here.
Stencil pattern can be found here.
Step 2: Paint the Birdhouse Edges
Any part of the birdhouse that will show after you’re finished adding the paper will need to be painted white (or another color if you’d like). Go ahead and do that now so it has time to dry before you’re ready to start in on the Mod Podge.

Step 3a: Cut your Scrapbook Paper (If using the stencil)
If you’re using a cutting machine, skip to the next step!
Print your pattern and cut out the stencil pieces you need. Lay your pieces out on your scrapbook paper, trace around them, then cut! You can design your birdhouses however you’d like, but I liked it best with one of the birdhouse roof pieces the same as the front and one the same as the sides. Then the other two pieces I made with coordinating paper.
You can now skip to step 4.
Step 3b: Cut your Scrapbook Paper (If using a cutting machine)
Load the cut file into your program.
The cut file may not load in the proper size (I’m still learning to make these!), so I’ve included the dimensions you’ll need to adjust them down to. If you select all the pieces together and adjust them all at the same time, they should stay proportional and all be the right size.
Birdhouse 1: The base of the front of the house should be 2 3/4 inches.
Birdhouse 2: The base of the front of the house should be 2 5.5/8 inches.
Birdhouse 3: The base of the front of the house should be 2 7.5/8 inches.
After you’re done adjusting, you’ll want to separate the pieces. This works differently for different cutting machines. I can only help with the Silhouette Studio software, so if you’re using a different machine, Google can be a help to you!
For Silhouette Users:
The DXF file will actually import into the Silhouette Studio as separate pieces, all ready to cut! Once you’ve adjusted the size, you can go to “Send” and then select which pieces you want to cut based on what paper you’re running through. Easy as that!
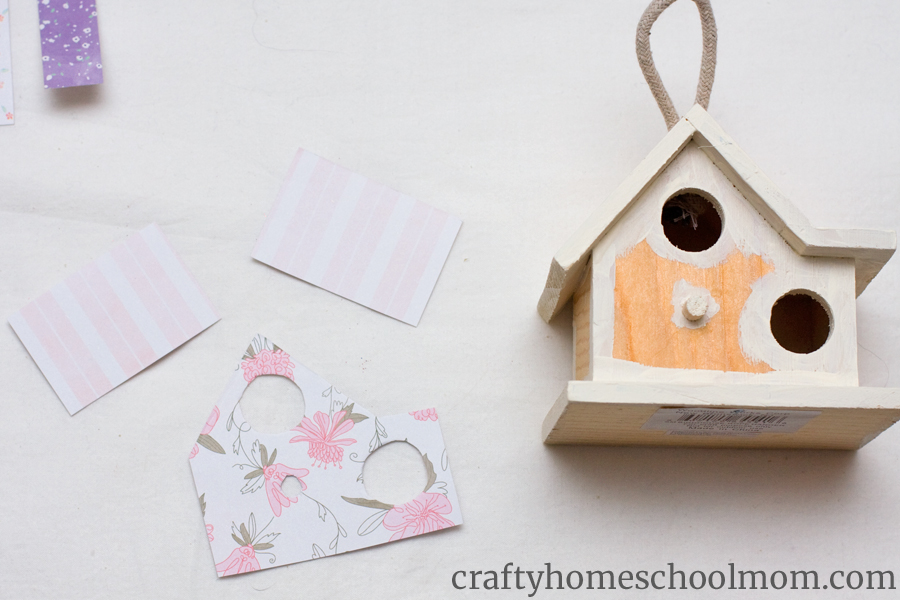
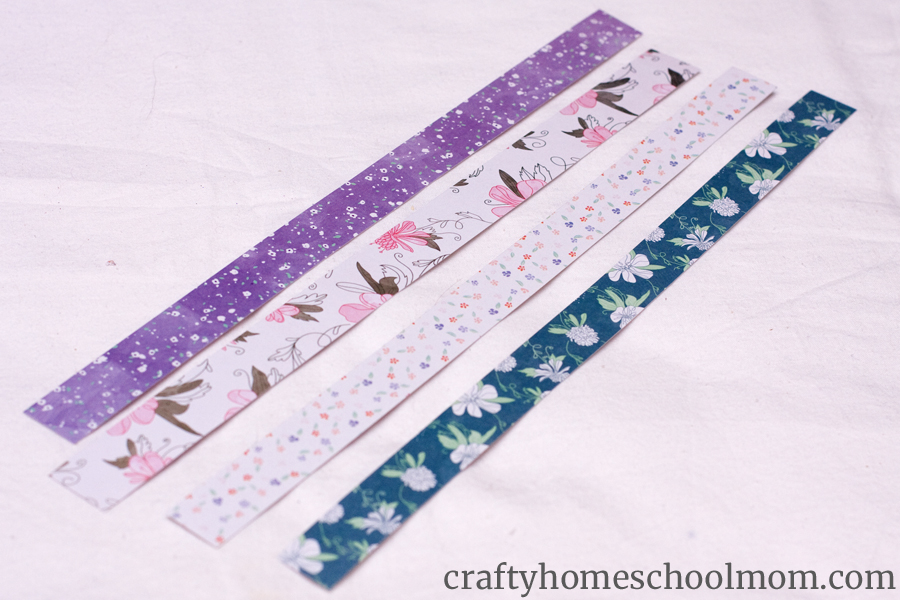
Step 4: Prepare the Pieces
Before gluing, it’s best to make sure everything is going to fit right.
*Disclaimer* As we’re working with Dollar Tree products and not something I’m making and sending to you, I can’t promise these will fit perfectly! There could be manufacturer flaws, user error, or Dollar Tree may decide to start making their birdhouses a different way! Please don’t send me hate mail if my free patterns don’t fit the birdhouses. (*whew* I’m glad I got that off my chest!)
Back to work! Line your pieces up on the birdhouse to see if they fit. Hopefully they do! At this point, you want to make as many folds as you can. Fold the roof pieces around the edges and fold the front piece around the corners. Then pull them off the birdhouse and make those folds nice and crisp. This will help them stay on better when you start gluing.
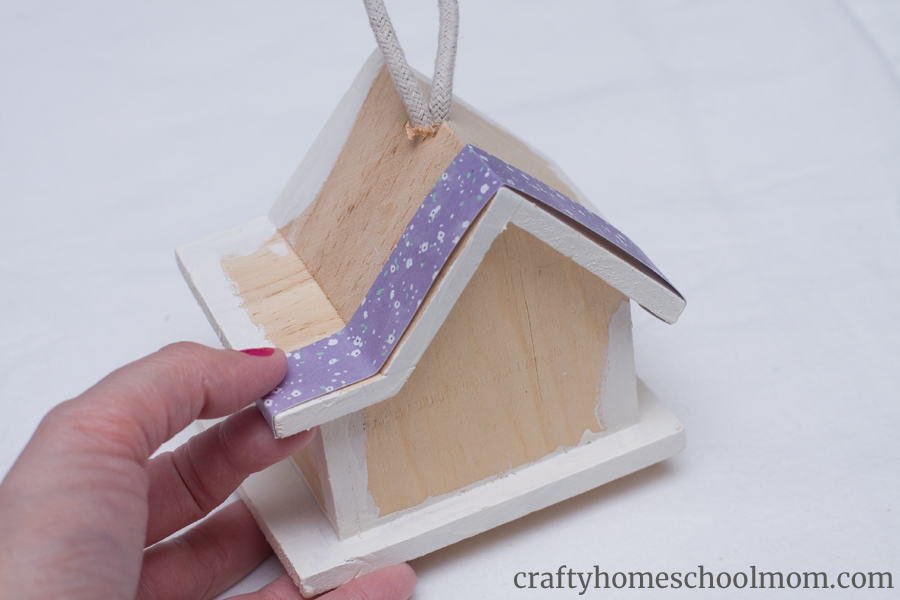
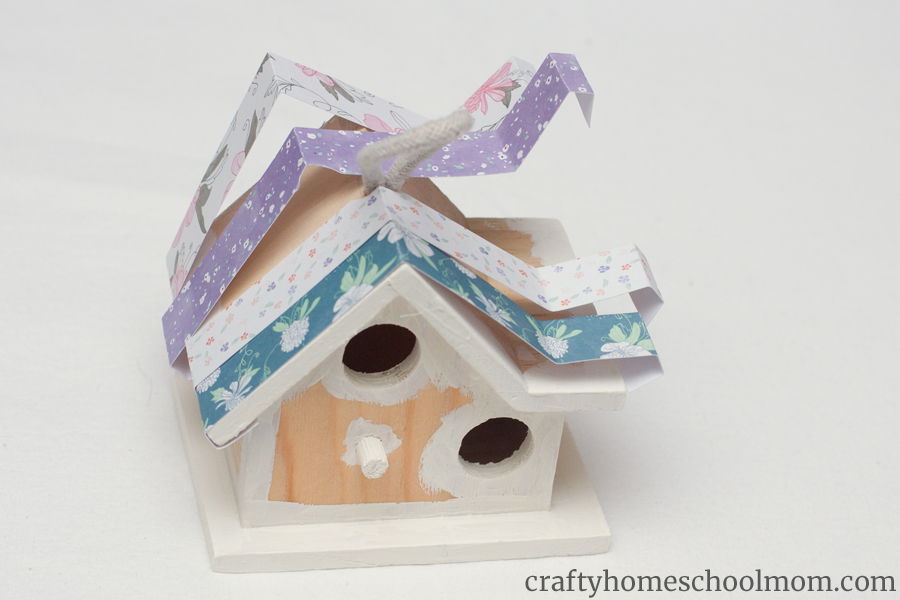
Step 5: Start Gluing
Use your sponge brush to cover the front of the house with Mod Podge and stick the front paper piece on. I find it’s best to let it dry a little before gluing down the sides so that if you get an air bubble you can smooth it out. Once you’re sure it’s stuck well, glue down the tabs on the front piece as well as the sides.
I apologize, I don’t have in progress photos of this because frankly, I was a mess! I had Mod Podge all over my fingers. Haha!
Anyway, once your front and sides are securely in place, use the Mod Podge to stick down the roof pieces. Start with the top of the roof, let that dry a little, then add Mod Podge around the eves and fold over the edges of the roof pieces and stick them down.
You may have to push on the little flaps of paper for a bit to get them to stay down, but after a minute or so, the Mod Podge will start to get tacky and they’ll stick.
Step 6: Seal Your Decorative Birdhouses
I like to give the whole birdhouse a coat of Mod Podge. It gives it a nice, finished look and protects the paper from getting damaged by time or little fingers. Use your sponge brush to put a thin layer of Mod Podge over the whole project and let dry.

And that’s it! You’ve completed your beautiful, decorative birdhouses for spring! I hope they bring you lots of joy as you prepare your home for the changing seasons!
As always, if you have any questions, don’t hesitate to ask! I’d love to know what you think of this project. Be sure to drop a comment below!
Leave a Reply