Center Pull Yarn Ball Basics
When crocheting or knitting, it’s important to have a ball of yarn that is easy to work with. You don’t want your yarn ball rolling away or constantly getting tangled as you work. When you create a center pull yarn ball, you can work easily with your yarn without having to fuss with it as you’re also trying to count stitches or follow a pattern. Your crocheting becomes more enjoyable and the time spent is well managed.

Why not just use the ball of yarn the way it comes from the store?
This is a great question and definitely a valid one. I normally use the ball of yarn just the way I buy it from the store. The yarn I buy is usually a center pull skain, so it’s easy to use. Here are some reasons you might need to know how to roll a center pull ball of yarn.
- Sometimes while you’re crocheting, you come across what I like to call “Yarn Vomit”. Yarn vomit is what happens when you find a little tangle as you’re pulling yarn out of a center pull skain. You pull and tug and then…it’s like all the guts come out of the inside of your skain of yarn. You end up with this massive mess to untangle. Once you finally get it all sorted out and all the knots of yarn untied, you need to re-wind your yarn ball. You can either wind it around the outside of the existing ball or re-wind the entire ball of yarn. I prefer to go ahead and re-wind the ball as a center pull ball.

- You might also need to wind your yarn into a ball if you buy these fancy (and beautiful!) hanks of yarn. They are usually available at the higher-end yarn stores and are specialty yarns, often hand died or hand spun. I’ll be honest and say I’ve never purchased a hank of yarn. The price tag is just too much for a mom with four kids and a dog at home! Ha! Anyway, if you have the pleasure of purchasing a hank of yarn, it will definitely need to be rolled into a ball before you try to crochet or knit with it.


Center Pull vs. Traditional Yarn Ball
You may be wondering why you should create a center pull yarn ball instead of just rolling your yarn up in a ball like you’ve done all your life. After all, it’s always worked before. Well, let me tell you, if you’ve never made a center-pull yarn ball, you’re in for a treat! These balls are easy to make and are so wonderful to use.
How a traditional yarn ball works
When you wind a yarn ball the “old fashioned” way, you start with a small ball of yarn, probably wrapped around your fingers, and then wind the yarn around it over and over until you have a large ball. This makes nice looking balls of yarn and does a pretty good job keeping your yarn from getting tangled. The problem with this method is that as you crochet or knit, every time you go to pull out more yarn, the ball has to roll. It can easily roll off your lap or off the couch onto the floor. If you’re like me, you’ve had yarn balls roll across the room as you pull more yarn off them to crochet. And pulling the yarn to get it to roll back usually doesn’t work.
How a center pull ball works
When you wind a center pull ball (as you’ll learn to do below), the yarn you’re pulling to work on your project comes from inside the ball. When you give the yarn a tug, it comes from the middle of the ball and therefore the ball doesn’t roll. You can set the yarn ball in your lap and pull out what you need as you work. Often, you don’t even have to pull the yarn. It just comes out smoothly, on its own as you crochet. A center pull yarn ball never tries to roll away.
Is a center pull ball harder to create?
Simply put – no. It takes the same amount of skill to create a center pull ball of yarn as it does to create a standard ball of yarn. You’re still just wrapping the yarn around itself to make a ball. The only difference is that you have something else to wrap the yarn around to begin with. And that brings us to the supplies you’ll need to create your center pull yarn ball.
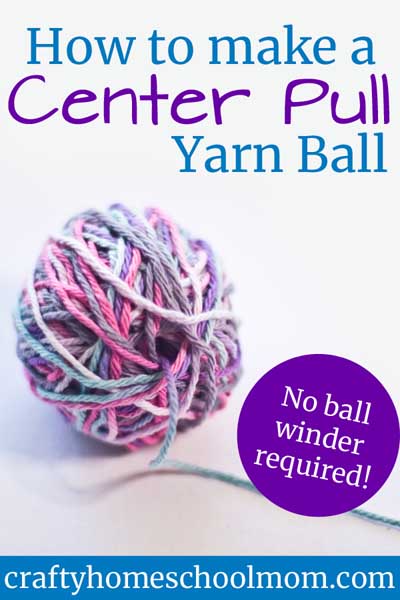
Supplies for creating a center pull yarn ball
Thankfully, you don’t need to buy any special equipment to create a center pull yarn ball. There are fancy yarn winders available at craft supply stores and online, but unless you just really want to spend $25+ and have another gadget laying around, it’s not necessary to spend the money. If you were going to be winding LOTS of yarn balls, you might invest in something like that, but for the average crocheter/knitter, it’s not a necessary purchase.
All you really need to wind your own center pull yarn balls by hand is a straw, your yarn, and a pair of scissors.
Why a straw and not a toilet paper roll?
I’ve watched lots of videos where they use a toilet paper roll to create their yarn ball as is shown here. This method works, but honestly, I’ve tried it and I don’t like to use it. The toilet paper roll creates a large hole in the center of the yarn ball which makes it more floppy and can cause the yarn to tangle more easily. Think about when you buy yarn from the store that comes in a center pull skain. Once you’ve used part of that skain, the hole in the center is quite large and the entire skain is floppy. The lack of tension on the yarn ball causes the yarn to tangle more easily. I like the hole in the center of my yarn ball to be smaller (at least to start out). So a straw works perfectly!
Do I have to use a straw?
If you don’t have a straw lying around, there are many other options. You could wind your ball around a pen or pencil, a dowel rod, or even your finger (although I wouldn’t recommend that if you have very much yarn to roll). The straw works well though because you can cut a small slit in the end to hold the end of the yarn. If you’re using something other than a straw, you’ll want to tape the yarn or hold onto it somehow so you don’t lose the tail inside the ball.
How to wind a center pull ball of yarn
Creating your center pull yarn ball is easy! I’ve made a video for you that walks you right through everything you need to know. If you prefer to follow written instructions, you can find those below.
Secure your yarn
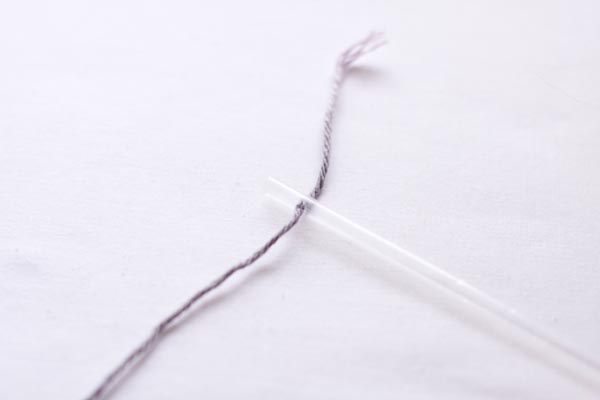
Using your scissors, cut slits about 1” long in the end of your straw. You want to cut through both sides of the straw so you have slits facing each other. Then, insert the yarn in those slits so it’s secure.
Start rolling
With the yarn secure in the slits, begin twisting your yarn around the middle of the straw. Roll until a small ball begins to form. There is not a special pattern of rolling you need to follow in the beginning, just wrap the yarn until you’ve gone around about 15-20 times.

Stack the yarn
Once this small ball begins to form, you can start rolling at an angle so your yarn goes from the top of the ball on one side to the bottom of the ball on the other. Roll it in this fashion a few times, then turn the straw slightly. Wrap the yarn around, top to bottom, a few more times, then turn the straw slightly again. You will begin to see an “x” pattern forming on your yarn ball. Continue in this pattern as the ball grows.

What if my yarn ball looks too egg shaped?
If you’re using a large amount of yarn, your ball could start to take the shape of an egg more than a sphere. At this point, you want to wrap your yarn more around the middle of your ball for a while. You do not need to continue the “top to bottom” pattern as this is really more for looks than anything else. After wrapping around the middle for a while, you can resume wrapping top to bottom to give it that nice “factory wrapped” look.

Finishing off your center pull yarn ball
When you get to the end of your yarn, you want to tuck the tail in so that you don’t accidentally grab the outside strand and start pulling that. Take a crochet hook and slide it under the outer layer of yarn on your yarn ball and pull the tail through. You can do this several times until that piece of yarn is completely hidden.
Now you know how to make a center pull yarn ball!
After following these simple steps, you too will be able to create these center pull yarn balls that can make crocheting and knitting so much more enjoyable. I hope this has helped you and that you are able to be confident in this new skill!
Articles Related to Winding a Center Pull Yarn Ball
How to Curl Yarn
Learn how to curl yarn using tools you likely have around the house. This curled yarn is perfect for doll hair, hats, and so much more!
Mason Jar Crochet Pattern
If crocheting is your thing, you’ll love this pattern! Decorate a mason jar with this beautiful crocheted cover and use it as a vase, a special gift wrap, or to hold your coffee.
Crochet for Kids
Have a child (or even yourself!) who would like to learn to crochet? Take my course, Craft Connections – Crochet for Kids to go from never having held a hook to confidently crocheting and reading patterns. Learn four different stitches and make three projects during the course.

What do you think of this center pull yarn ball method?
If you’ve made yarn balls in the past, I’d love to hear what you think of this method. Give it a try and let me know if it’s something you’ll use in the future. I love how it gives me a way to keep my yarn neatly organized and easy to use.
Leave a Reply